How to Submit a Sitemap: Step‑by‑Step Guide
Introduction
In the digital age, search engines are the primary gateway for users to discover content. A sitemap is a roadmap that tells search engines which pages exist, how often they change, and their relative importance. Without a sitemap, crawlers may miss important pages, leading to lower visibility and slower indexing. This guide walks you through every step of creating and submitting a sitemap, from choosing the right format to verifying it in Google Search Console. By the end, you’ll understand the nuances of XML versus HTML sitemaps, how to test for errors, and how to keep your sitemap up‑to‑date as your site evolves.
While many website builders offer automated sitemap generation, the process still requires human oversight. You need to confirm that the sitemap is valid, contains all critical URLs, and follows best practices such as prioritizing high‑value pages. Once submitted, search engines will use the sitemap as a signal to crawl faster and more accurately. This article covers the entire workflow, including troubleshooting common issues and optimizing for the newest SEO guidelines in 2026.
Step 1: Decide on Sitemap Format
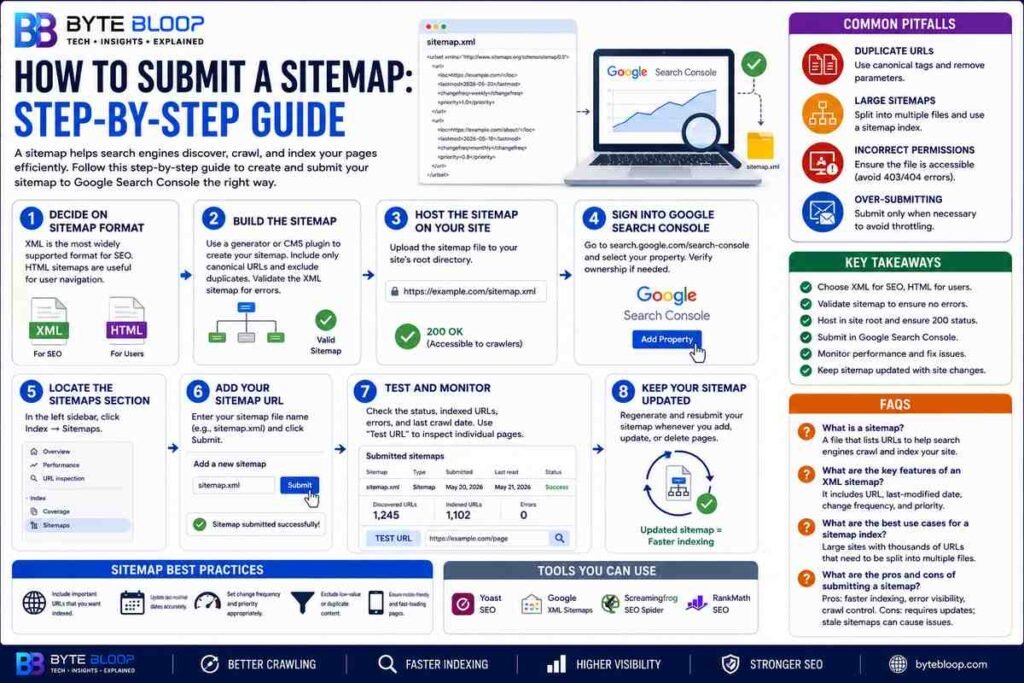
Google accepts several formats, but XML is the most widely supported for SEO. An XML sitemap lists URLs, last‑modified dates, change frequency, and priority. HTML sitemaps, meanwhile, are user‑friendly and can improve site navigation. For most sites, a single XML sitemap suffices, but large e‑commerce sites may need a sitemap index that references multiple smaller sitemaps.
Step 2: Build the Sitemap
Use a sitemap generator or CMS plugin to compile your URLs. Ensure you include only canonical versions and exclude duplicate or parameterized URLs that could cause crawling issues. After generating, validate the XML against the schema using tools like Google’s Test‑URL tool or online validators. A clean, error‑free sitemap is essential for successful submission.
Step 3: Host the Sitemap on Your Site
Place the sitemap file in your site’s root directory (e.g., https://example.com/sitemap.xml). Verify that the file is publicly accessible by entering the URL in a browser. A 200 HTTP status code confirms that the file can be fetched by crawlers.
Step 4: Sign Into Google Search Console
Navigate to https://search.google.com/search-console and select the property that matches your domain. If you haven’t added the property yet, use the “Add Property” wizard to verify ownership via HTML file, DNS record, or Google Analytics.
Step 5: Locate the Sitemaps Section
In the left sidebar, click Index then Sitemaps. This opens a dashboard where you can add new sitemaps and view submission status.
Step 6: Add Your Sitemap URL
In the “Add a new sitemap” field, type the file name (e.g., sitemap.xml) and click Submit. Google will queue the sitemap for crawling. You’ll see a status message indicating whether the submission was successful or if errors were detected.
Step 7: Test and Monitor
After submission, click the sitemap entry to view detailed reports. Google lists the number of URLs indexed, any errors, and the last crawl date. Use the Test URL feature to check individual pages for indexing issues. Regularly monitor the dashboard to ensure new pages are being indexed promptly.
Step 8: Keep Your Sitemap Updated
When you add, delete, or update pages, regenerate the sitemap and resubmit. Many CMS plugins automate this process, but manual resubmission is still required in Google Search Console. Updating the sitemap signals Google to revisit changed pages sooner.
Common Pitfalls and How to Avoid Them
Duplicate URLs can cause confusion; always use canonical tags and remove parameters. Large sitemaps should be split into multiple files and referenced via a sitemap index. Incorrect file permissions (e.g., 403 or 404) will prevent crawlers from accessing the sitemap. Finally, over‑submitting can lead to throttling; submit only when necessary.
Key Takeaways
- Choose XML for SEO‑heavy sites, HTML for user navigation
- Validate the sitemap before submission to avoid errors
- Host the sitemap in the site root and ensure a 200 status
- Use Google Search Console to submit, test, and monitor
- Keep the sitemap updated whenever site changes occur
- Split large sitemaps into an index for better crawl efficiency
Frequently Asked Questions
What is a sitemap?
A sitemap is an XML or HTML file that lists the URLs on a website, helping search engines discover and index pages efficiently.
What are the key features of an XML sitemap?
XML sitemaps include URL, last‑modified date, change frequency, and priority, providing search engines with context about each page.
What are the best use cases for a sitemap index?
A sitemap index is ideal for large sites with thousands of URLs, allowing you to split the sitemap into manageable files and reference them collectively.
What are the pros and cons of submitting a sitemap to Google Search Console?
Pros: faster indexing, error visibility, and crawl control. Cons: requires manual updates and can be misused if not kept current, leading to stale data.
Conclusion
Based on the available information and industry analysis, submitting a sitemap is a foundational SEO practice that accelerates indexing, reduces crawl errors, and enhances visibility across search engines. By following a structured, step‑by‑step approach—selecting the right format, validating the file, hosting it correctly, and monitoring through Google Search Console—webmasters can ensure their content reaches audiences efficiently and reliably.
Related Reading
- Optimizing Your Site Structure for SEO in 2026